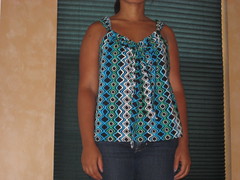
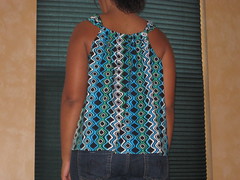
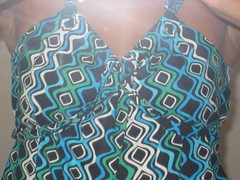
I got a little down with the Simplicity dress I was working on and totally ditched the project. A confidence booster was needed to get me back in motion. The Butterick B5216 definitely fit the bill. I followed the directions exactly as written (almost) and am somewhat pleased with the results. When I say pleased I mean this is going to be wearable when I am completely finished. Completely finished by my guidelines not theirs.
 |  |
The fabric was leftover from my daughters skirt. Only requiring a 1-5/8 yard of fabric it was worth a try. Lani J made view B so I opted for View A.
The first step of this project is to put in a buttonhole. Intimidating. A little, so I skipped it and opted to go as far as I could without having the buttonhole done.
Narrow hems are a pain to me. Fold. Press. Unfold. Fold. Press. Fold Stitch. Waaaaaaaaaa. I don't have a foot to do it so I meticulously measure and fold and after what seems like eternity stitch it down.
Back to the buttonhole. After testing it no less then 10 times on scraps I went ahead and did the buttonhole. It turned out fine. I could have made it a little longer but no worries.
I got my first opportunity to hand sew on this project. Actually, that is not counting the hooks and eyes I have conveniently skipped sewing on. A slipstich is required for the tie of the shirt. Again I took a look at the glossary, cross-referenced another book, and hit a few YouTube videos. I did my best and it turned out fine. Whether or not it was a true slipstich..who knows but it got the job done.
I tried the shirt on before doing the final bottom hem and my kids said it looked short. I made the narrow hem just a tad thinner but I am still going to have to make some modifications.
These are the modifications I have envisioned:
Lengthening the shirt by adding a solid color contrast to the bottom edge. Should I go white, black, blue, green. The shirt needs to be brightened some so I am hoping to find a matching blue or green. Regular seam or something else? I may just sew the other piece underneath so it gives it more of a layered effect. Thoughts?
In addition to adding length I am going to switch out the tie around the neck with the same fabric I use for the contrast at the bottom. I really would have done this anyway and the pattern does call for that but since I was just working with scrap fabric I had to use what I had on hand.
The third change will be lengthening the tie because I am actually planning to wrap the tie under my bust and tie it in the back. I tried it here but it will hopefully look much better tied in with the other modifications. It cuts the shirt and gives it more definition. Right now it is rather frumpy.
I will say this shirt seems to be a good base pattern. When I tried it on I did about fifty million different things to give it a new look. Elastic at the bottom, perhaps a ruffle at the bottom, lengthening for a dress. A belt. A different weight of material. The options are endless.
Oh, and next time I will make the small, I made the medium because of my waist and the armholes are a little larger than I'd like. I already toyed with the idea of taking it in some on the sides so it fits a little closer to my body.
More pics on my Flickr photostream just search B5216

Very cut top. I think I might have it in my stash. Great minds think alike!
ReplyDeleteNice fit, I like the print.
ReplyDeleteI love this top...you did a great job :)
ReplyDelete